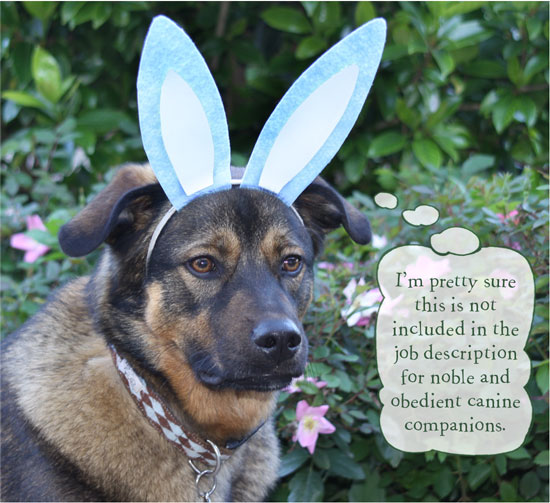
Without a small toddler in the house, we had to ask our pup, Neville, who will be 1 year old on Thursday, to model our seasonal Do-It-Yourself project. I know he looks a little bit humiliated here, but I pointed out to him that at least I had chosen blue ears to match his argyle collar, plus we gave him many excellent treats afterward and he was totally okay with it.
So, if you find out that you need some instant ears this week (school play or school project or just because) and it’s too late to run to the craft store, you can easily make these with supplies you might have on hand. This project is rated E for Easy … so easy, in fact, your little ones can make them in one sitting. Caution: Keep out of reach of dogs, because we could tell Neville was thinking about devouring his tasty-looking head gear after his photography session. “Bunny Ear Appetizer, Yum.”
Here are the quick and easy steps:

1. Make an ear pattern on scrap paper adding about 2” to the base for turning under the headband. Trace around the pattern onto shirt cardboard or cardstock. I happened to have some stiff felt, which is sold at most craft stores these days. (We keep this on hand in case of occasions like bunny ear emergencies.)
2. Find a headband in your headband drawer … the version with teeth works best because it helps to hold the ears in place. (If you only have boys, thus no headband drawer, you can find these headbands at any grocery store.) Wrap the base of each ear shape to the back side and staple from the front.
3. Cut out two pieces of ‘inner ear’ from a contrasting color. Glue inner ear to outer ear, covering the staples. We used roller adhesive because it is just so quick and easy.
4. Voila! Bunny ears in a snap.
6 Comments
-
The Easter Bunny may just drop a couple of these off in the boys’ baskets. Great idea!
-
Author
I didn’t even think of that! Have a wonderful Easter.
-
He IS a good dog!
-
That is adorable! Our French bulldog is about to get a pair of rabbit ears!
-
Author
Oooo, send us a picture, if you don’t think it will make Neville too jealous!
-
Awesome ears. And they are properly boyish! I will send you pics of our bunny-eared babies. I’m afraid we might have humiliated Clarence. :-)


