Hello handy people out there. It’s time for another studio DIY, but this time it is coming to you courtesy of Julianna and the newest canine member of studio East.
Before we dive right in, I’ll give you a little history about the way this new addition came to be…
Cathy and Jim of the Austin studio (who also happen to be my mom and dad) Skype with me multiple times a day. We discuss everything from color to coding from our shared screens. About two weeks ago, after a couple of hours on Skype, discussing our newest project (coming soon), I casually held up a photo of a furry little friend that was about 6 weeks old and said, “I’m getting a puppy and I’m picking him up in two weeks … okay, bye!” Luckily, I am an adult, married, and have a full-time job, so it went over way better than it had the many times I begged to bring home a dog in the past. Cathy’s only worry was that the new puppy might take the spotlight off of our family blog hog, Neville. So we’re not telling him about the new studio pup until he’s really ready.
Now, let me rewind even further…
Four years ago, I traveled to Copenhagen with Anton to visit his family and to see Denmark. One of my favorite memories from the trip was an evening excursion to Tivoli Gardens. It is the second oldest amusement park in the world, and many people say that it is the place from which Walt Disney found his inspiration for the Disney parks. As the night ended, I leaned over to Anton and asked, “If we ever get a dog, can we name him Tivoli?” Happily, he agreed. So, below is our new puppy, Tivoli Larsen.
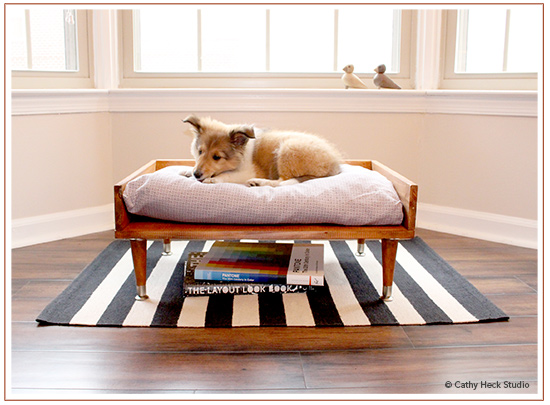
Now, on to his first DIY: A Scandinavian-ish napping bed. I have been pretty obsessed with modifying Ikea furniture lately with staining and small additions. My favorite new discoveries whilst Ikea-hacking are the pencil legs that I used for this DIY doggie bed. I found them at Lowe’s and I have used them on four other pieces of furniture. Anton suggested that perhaps I stop using them after this DIY. I think he may be right.
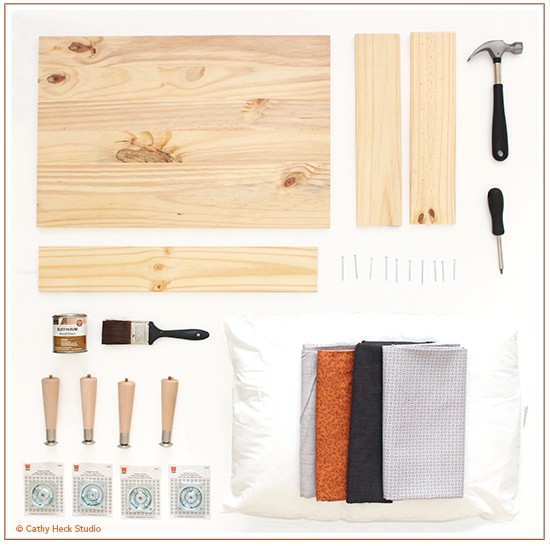
Supplies you will need:
Wood for the base, wood for the walls, nails, legs, the thingies into which you screw the legs, wood stain, pillow, fabric, hammer, screw driver, and a needle.
As you can see from my casual supply list, I wasn’t super specific about measurements … that’s because I just kinda winged it when I went to Lowes’ and Walmart. I did have them cut the wood to fit at Lowe’s, which is super handy if you don’t have a tool shed yet. In total, this bed cost $28. But, the bigger the dog, the bigger the bed. So if you have a Great Dane … well, yikes.
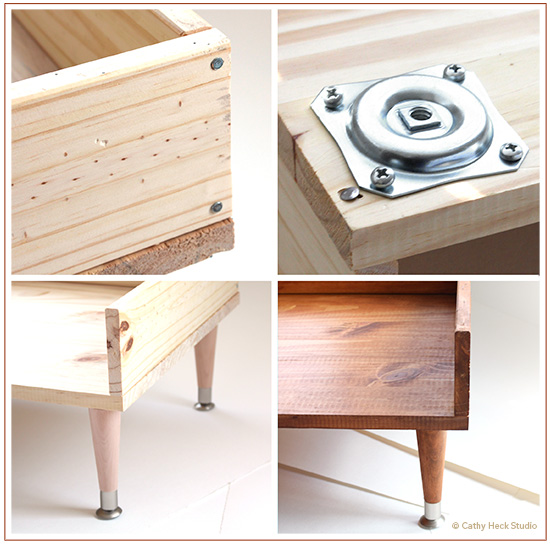
Directions: All you have to do is nail everything together, screw in those fancy modern legs, stain it and voila!
Making the sham for the pillow took longer than making the bed frame. But, that’s because I’m dreadful with a needle … my fingers literally look like I have been playing with a cactus. I was able to get two pillows out of the one I purchased at Walmart for $5, because I cut it in half like a bagel and made two shams!
So, if your pet would like to sport a modern vibe while lounging in a clean mid-century bed, you might want to give this a try!
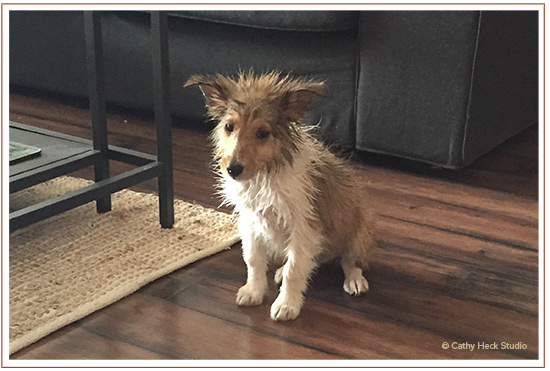
And for one more peek at our new spokesdog, here is Tivoli after his first bath. This is before he curled up in his fancy new bed for a few hours of beauty sleep.
And Neville, don’t worry, you can still be the blog star … I promise I will not be dressing Tivoli in the number of costumes that your human mom has dressed you!
6 Comments
-
Tivoli, what a great name Julianna! He’s absolutely sooooo adorable!!! What is he?
-
Thanks Alex! He is a Shetland Sheepdog…we love him so much. :)
-
He is uper adorable, Larry approves! And so handy with the bed making too!
-
uh, that’s ‘super’ adorable…or is it a new word, combining ‘uber’ with ‘super’? OK, let’s go with that!
-
Ronnie, not only do you write words, but you invent words. You are a ninja wordsmith!
-
Tivoli!!! Can’t wait to see him dressed up WITH his big brother Neville…


